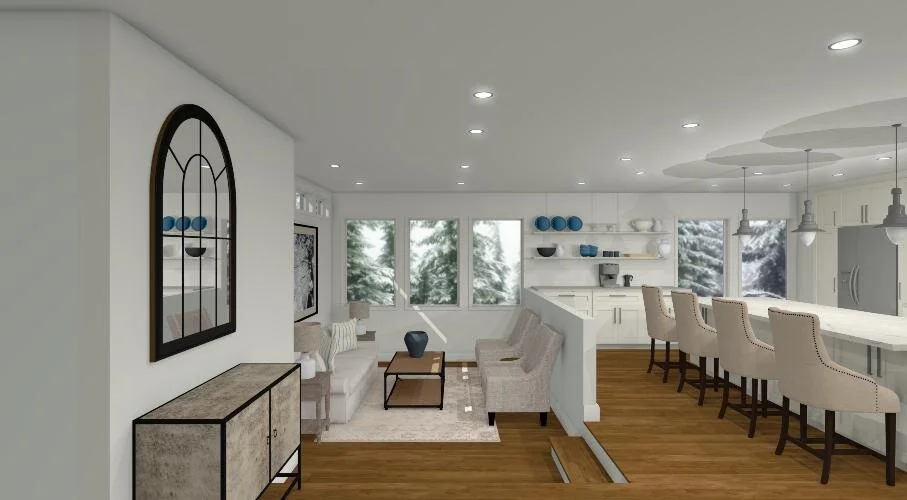
Online 3D Kitchen Design
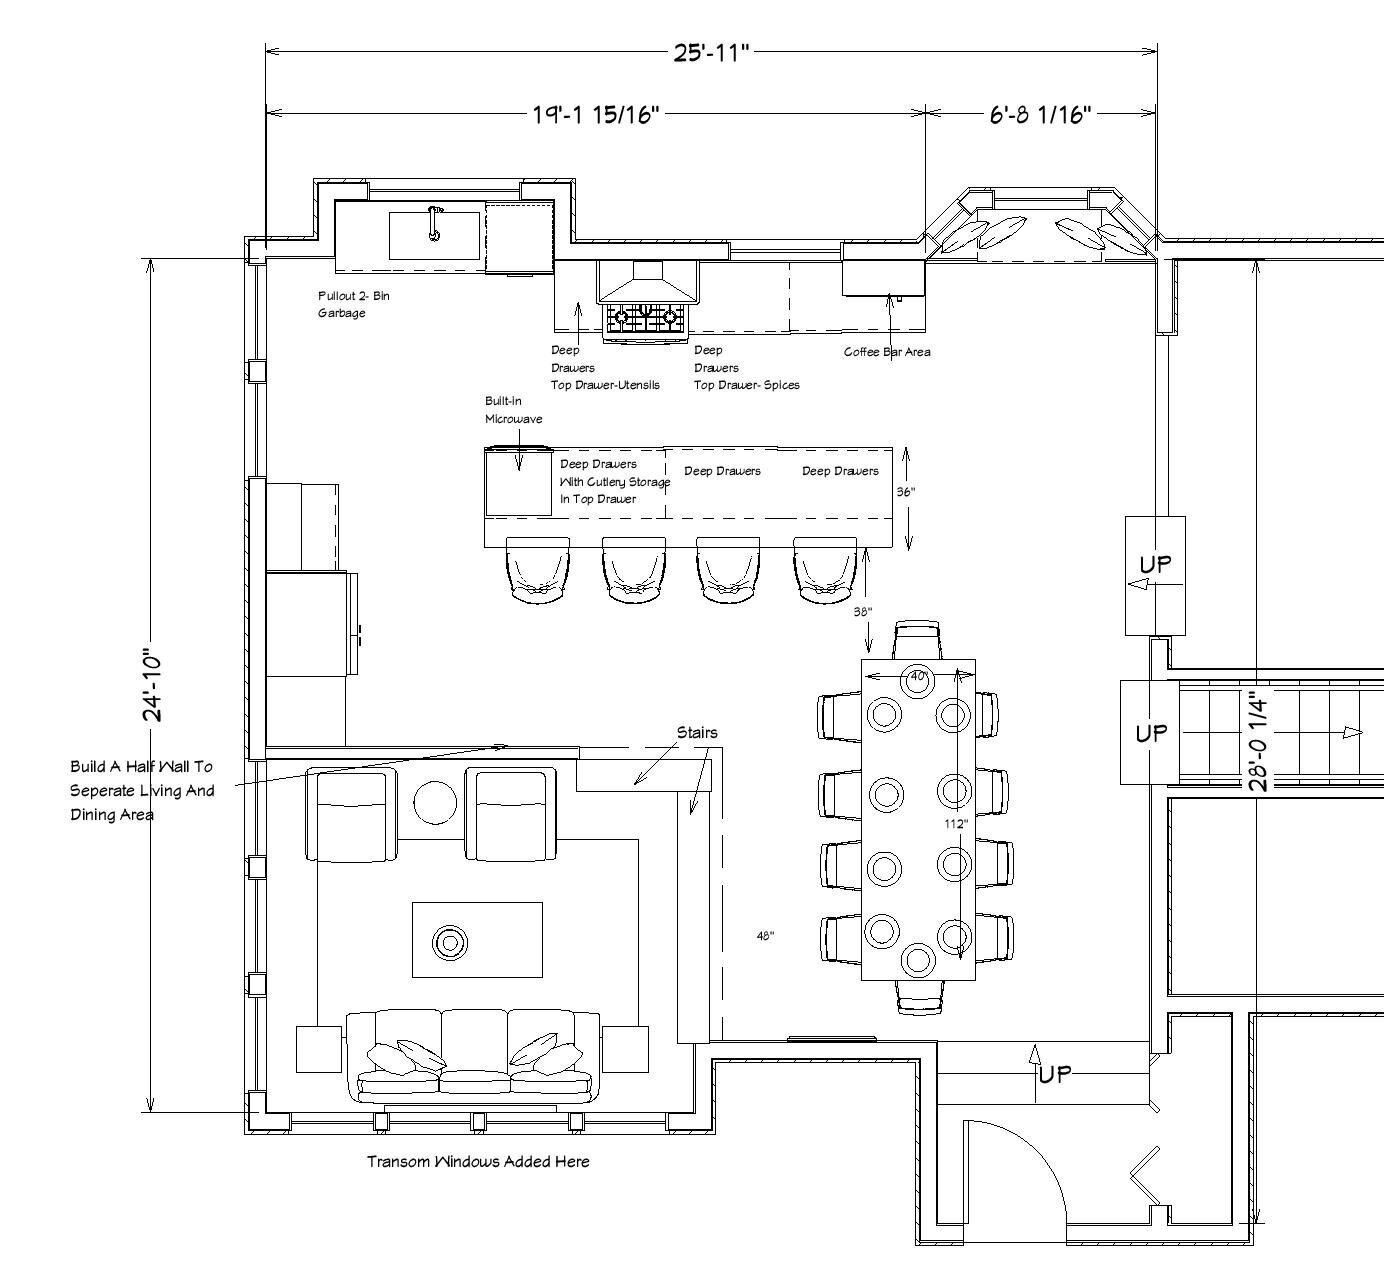
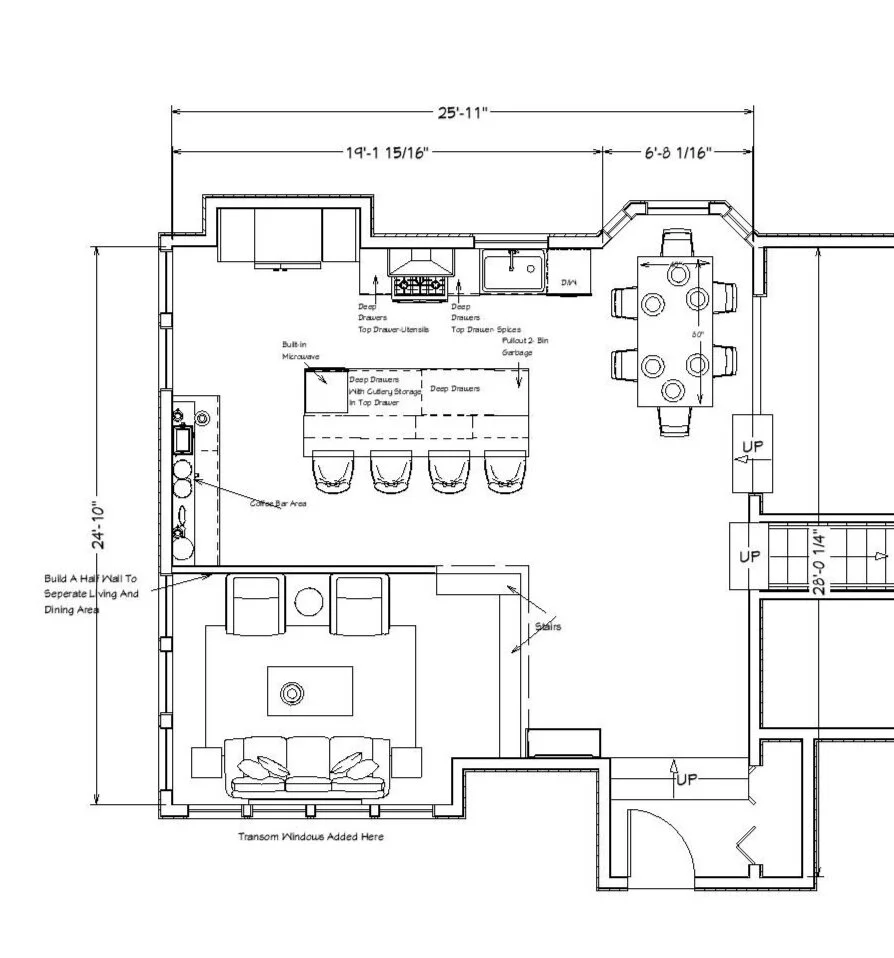
Final Floor Plan


Revised Floor Plans
For either option, the tables could work in the bay window area or the area above the sunken living room. I would recommend looking at the kitchen layout and deciding what plan you prefer and then I can make either dining room location option work with that layout. From there we can fine-tune the design you choose and get the cabinets laid out exactly as you would like.
Option B - Standard table
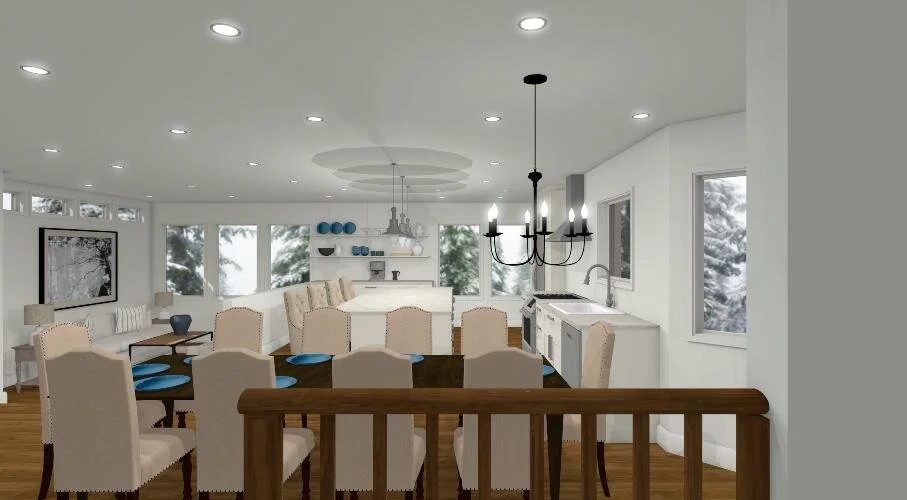
I have moved the stairs leading into the sunken living room in line with the jut out to give room for the table. Below is how the table looks for everyday use and I have also shown it extended for entertaining shown further down. For this option, the island would have to be a standard depth instead of having shallow cabinets on the back of the island to allow for the dining table. I have shown a window seat in the bay window but that can be eliminated if not wanted.


Option B - Table extended
To accomadate the large table it would have to be moved over a little when entertaining larger crowds.


Option C - Standard Table
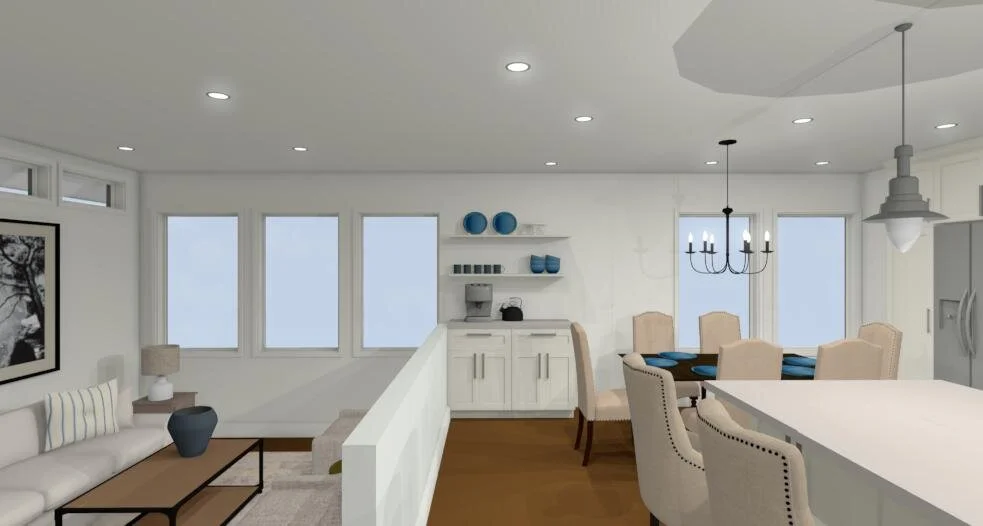
In this option I have tucked the dining table into the bay window area, it works but it is tight, there is 24” between the table and the railing and the dishwasher cabinet. I did have to eliminate the small narrow pullout that was in the previous plan. I extend the cabinets on the wall between the kitchen and living room but they don’t have to be this large, they can be made smaller or eliminated all together.


Option C - Table extended
To have the table extended for company the table would have to move out and over from the bay window.


Initial Floor Plan
Below are three initial floor plans, there is space below each to give feedback. Let me know what you like, don’t like or any elements you would like to add or delete. From there I will build your final design.
Option A
This option keeps part of your sunken living room, I have added a half wall to separate the dining area and living room. The nice thing about this is it keeps your higher ceilings in the living room area but with your walls down everything is still open to each other. This plan give lots of seating options and would be great when entertaining large crowds, whenever we will be able to do that again:)


Option B
This option still keeps part of your sunken living room. I added a window to the jut out like you had mentioned you were debating and placed the sink and dishwasher under there. This has the fridge moving to where I had placed the dining area and the dining table moving closer to the bay window. If you like this option we will have to play around with the exact dining table location so that it doesn’t interfere with the traffic flow to your family room or that it isn’t too close to the island.


Option C
This option has your sunken living room raised up so you have one large space to work with. For this option your fridge is placed in your jut out and I removed the window seat in your bay window. There is also a little coffee bar area between your kitchen and living room.


Let’s Get Started

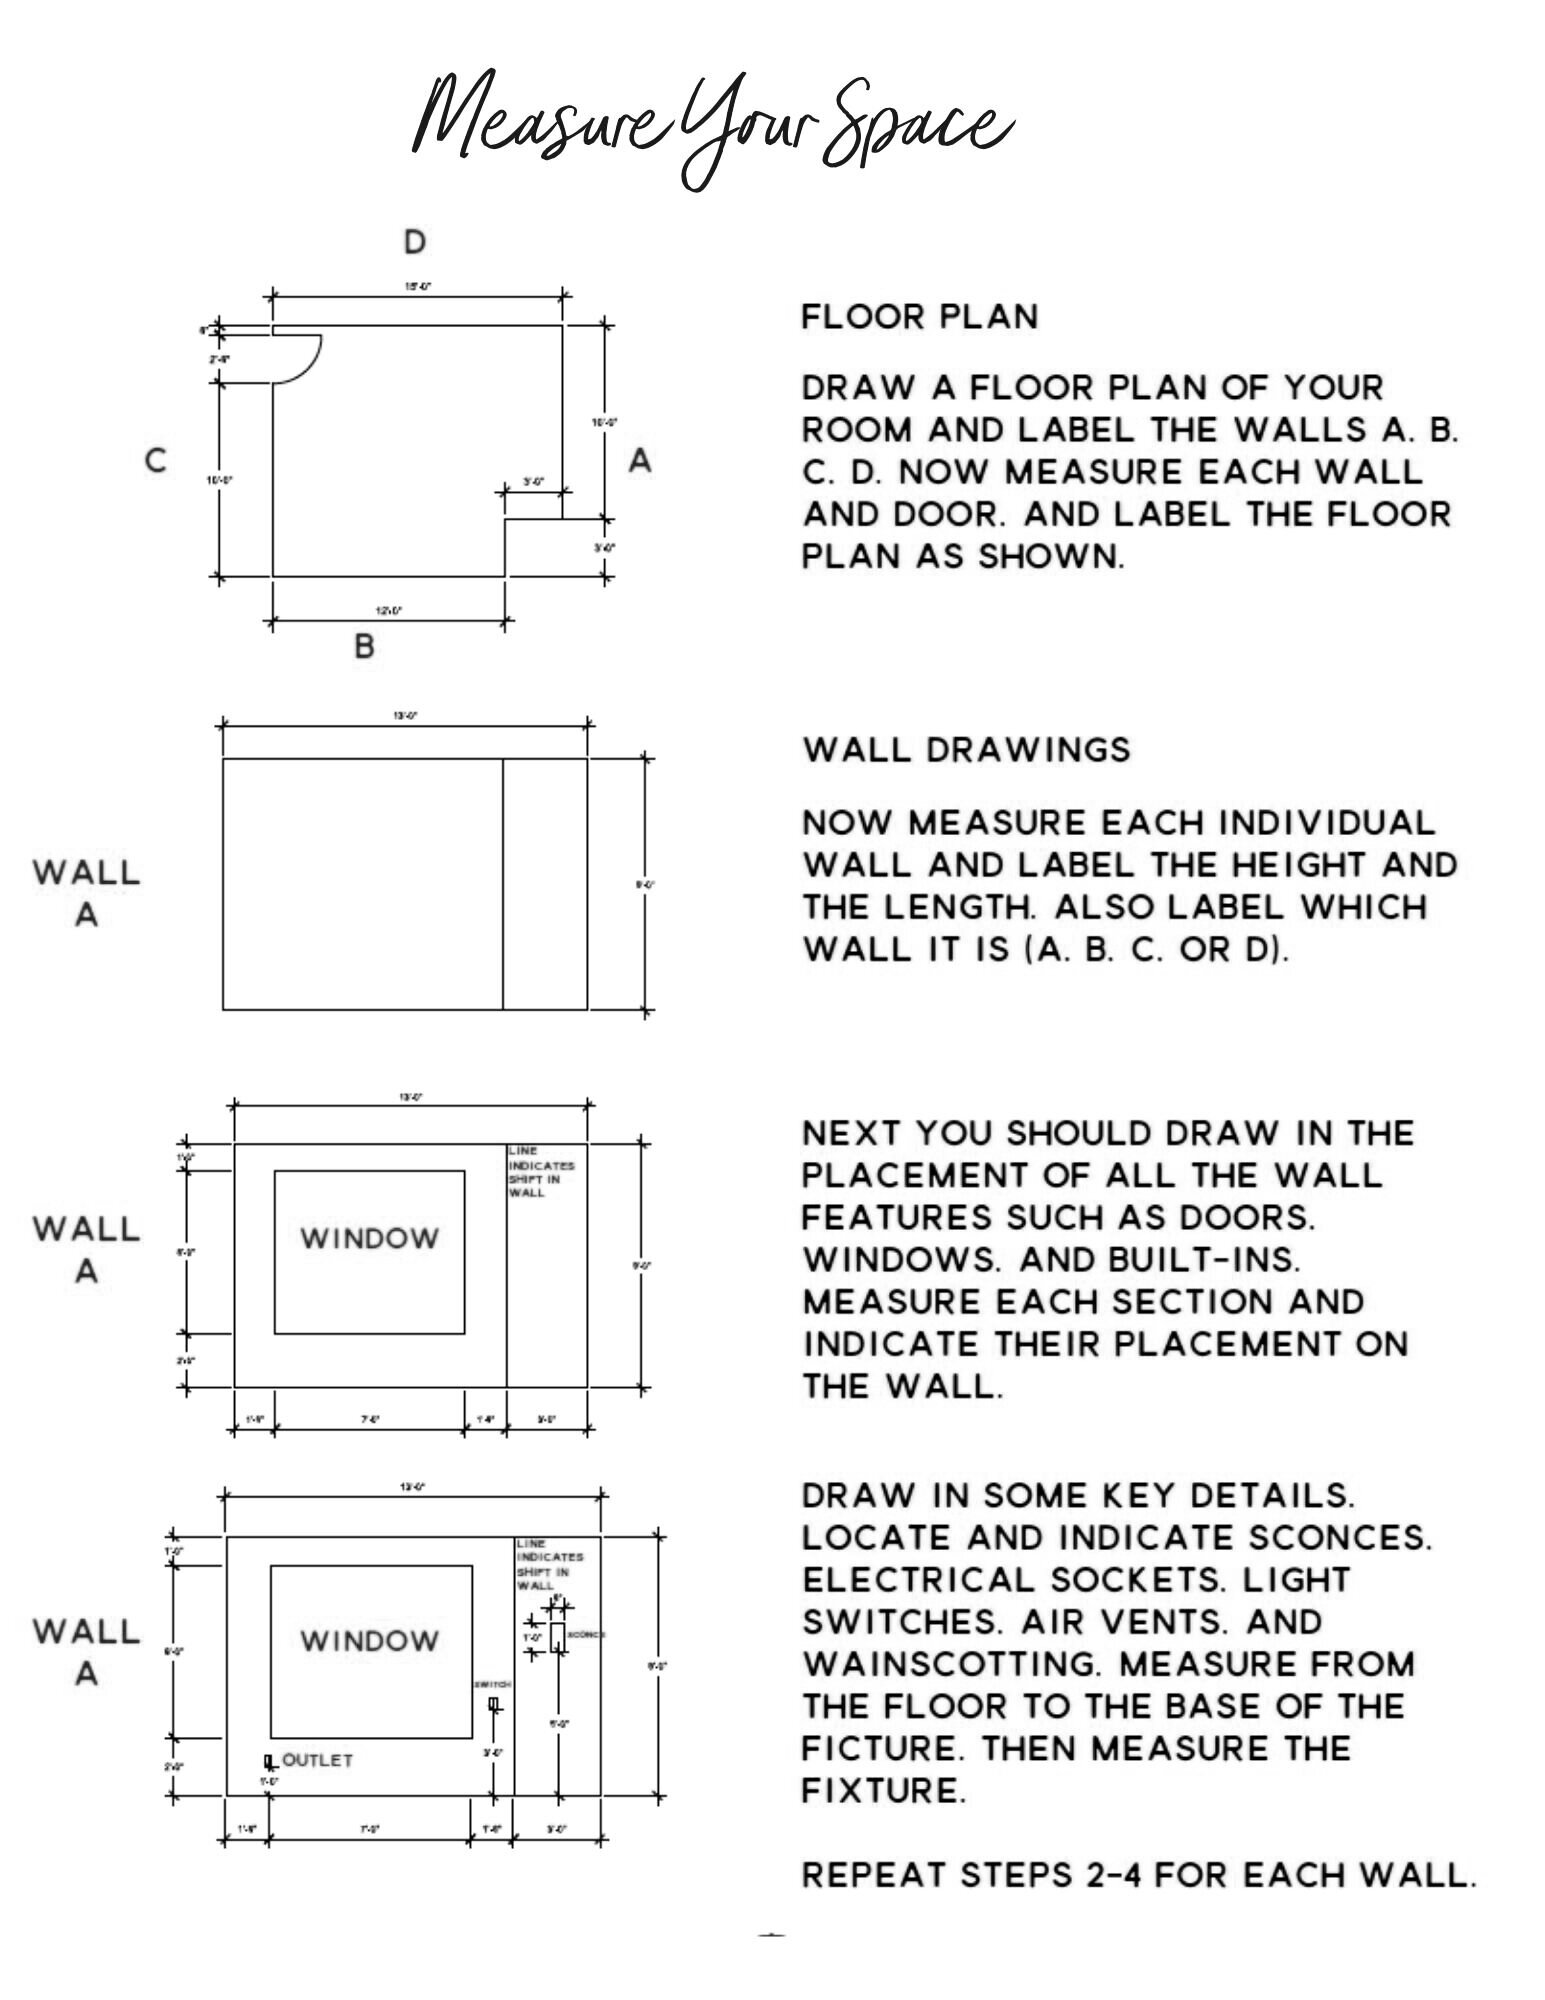
How To Photograph And Measure Your Space
There will be space to upload your photos and measurements in the Questionnaire