O’Connor Kitchen Design
Final Design Option A


Final Design Option B


Revised Designs
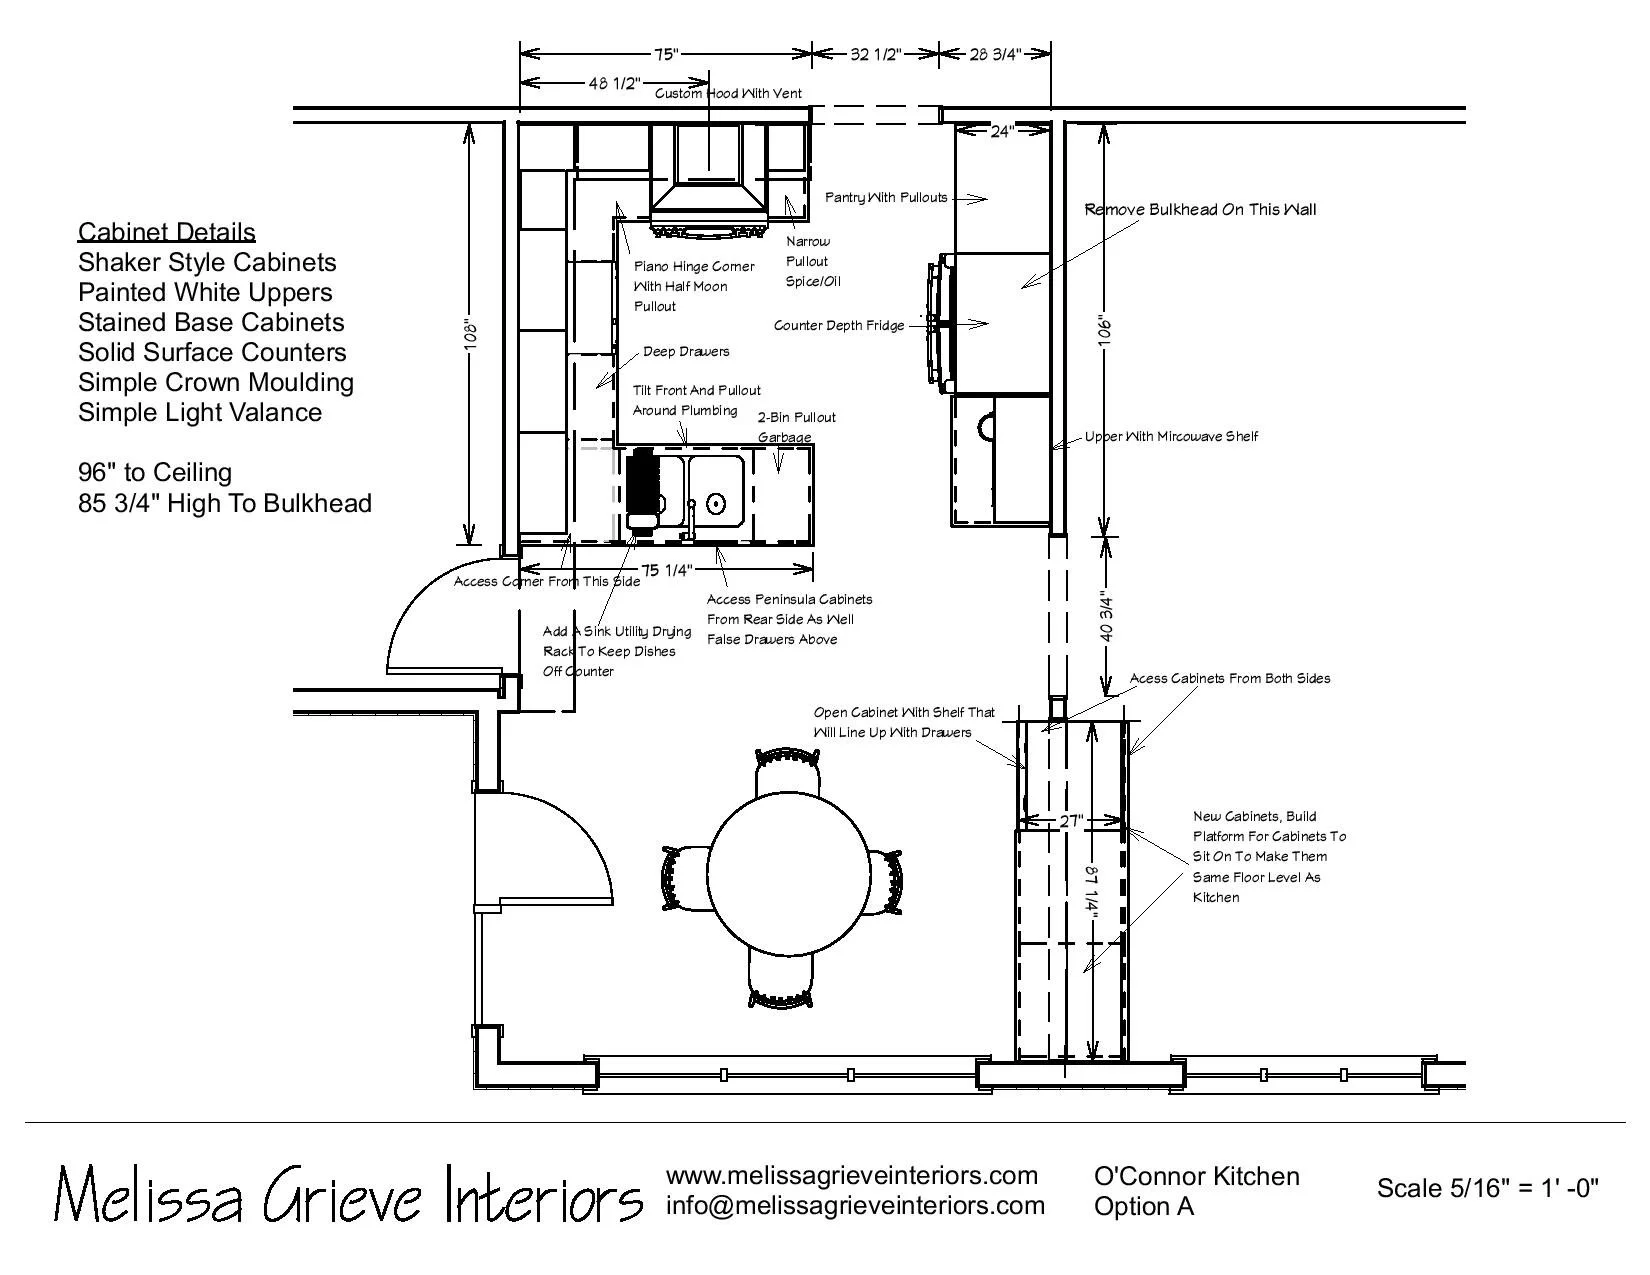
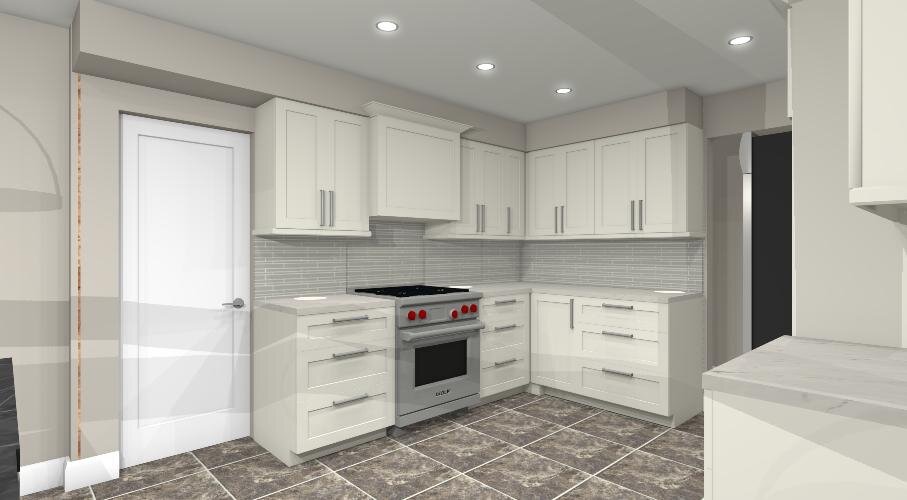
Option A
For this option I have removed the bulkhead going on the stove wall and kept it simple with just a large stainless exhaust hood. The cabinets between the kitchen and living room remain the same just painted to match the new cabinetry with an upper cabinet added above to hold all of the catch all’s and extra storage. I added two cabinet to countertops to house the microwave and the other for a coffee bar station.


Option B
For this option we have cabinets going on either side of the stove with an under cabinet vent hood. All new cabinets will go between the kitchen and living room on a platform. Right now I have shown the cabinets with doors but we could do deep drawers or a combination of closed and open storage if you wanted to display some items.


Feedback
Final Designs


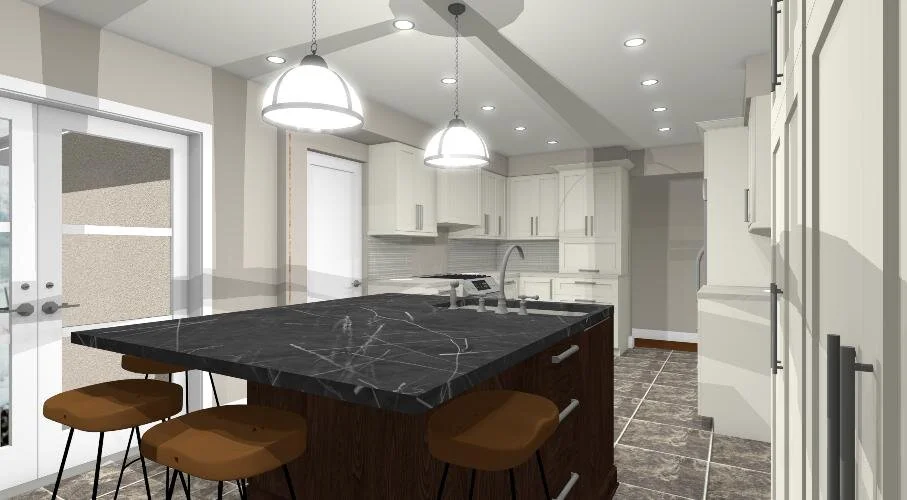
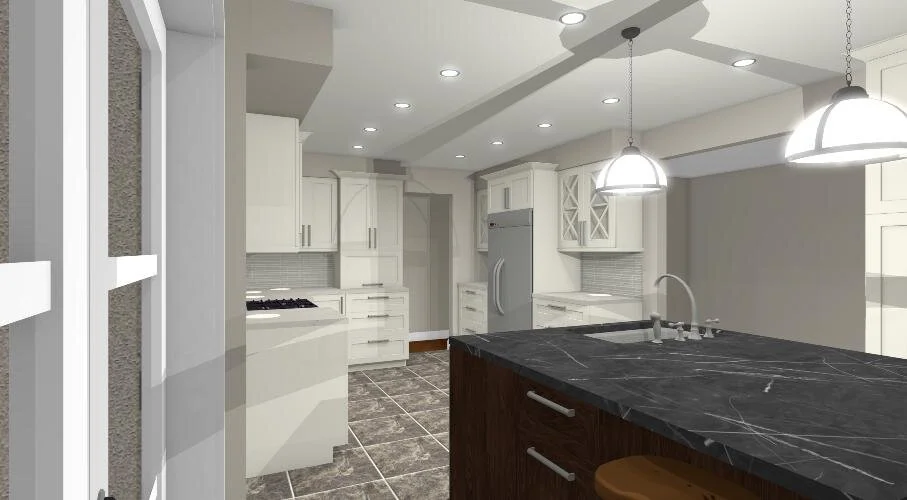
Island Option
I made all of the changes you mentioned in your email, I didn’t make the island any larger since I think this is the max size we should go to allow for traffic flow. I did add a dish rack on the counter beside the sink so you can see how that might work for you. Also, keep in mind that there are 18” cabinets on the back of the sink and dishwasher cabinet before the opening for the stools starts so there is quite a bit of room on the counter for working and eating, I also have another option I came up with for you to see below. I have changed the opening to the family room back to how it is currently so that if you don’t want to go to the expense of moving the support beam, let me know how you feel about that. I have placed the microwave in the end cabinet but I have also shown it above the appliance garage in the other option, let me know which location you prefer.


Peninsula Option
Changing the island to a peninsula coming off of the wall gives you room on either side of the sink which you may prefer. This option has the microwave tucked away beside the fridge, which I think looks nice. I also played around with changing the pantries to uppers and lowers, to do that you would have to create a bulkhead for the uppers to be secured too, what’s your thoughts on that? One other option we could consider is making the peninsula deeper by making the pantry smaller and adding shallow cabinets on the back of the peninsula cabinets, I have shown that below this option this option.


Larger Peninsula


I played around with the location of the built in oven and M/W and I think it works best here. The other option would be having it beside the fridge which is not ideal. Having an appliance that needs to cool and one that needs to heat beside each other makes them work a little harder. Moving the appliance garage to the left of the fridge was a great idea and I think it makes a lot of sense. Since the cabinets are no longer exactly the same height on either side of the fridge I moved the glass doors to either side of the stove. I also moved the pantries to the other side of the wall on your family room, let me know how you feel about that, I do think it gives more room around your island.


Swapped Sink And D/W and Standard Depth Fridge
I have the fridge show at a 28” depth, fridges range quite a bit in size but I wouldn’t go too much larger that this. Another thing to keep in mind is with Ikea fridge cabinets come in 24” depth but you could still work around that by having a gap at the back.


No Bulkheads
Here is how your kitchen would look if it was possible to remove your existing bulkheads


Measurements


Interior Features

For your pantry consider adding pull outs to the bottom half or third to make it easier to access everything.

For your base blind corner you can keep it as just a shelf which you can keep larger appliances in that you don’t use very often, or large platters, any items that are bulky but not often used. Or you can add in a feature like a magic corner to have easy access to that space.

For your drawers if possible I recommend going with dovetail drawers and full extension tracks with a soft close feature.
Concepts
These are two initial design plans, let me know what you like, what you don’t like and we will build from there. If there is one clear winner great or you may like aspects from each and I will create a completely new design incorporating the elements that you love. There is a spot below each option to give feedback, just hit submit and it sends it To my email. Once I get your feedback I will get even more detailed on measurements, storage SOLUTIONS And making sure the design is as functional as it is BEAUTIFUL.
Option A
In this option I kept the stove where it is currently and moved the entrance to the dining room to the center of that wall. My reason for doing that is to add more separation between the stove and sink and to give more working space and room if two people are cooking or working in the kitchen at one time. I have closed the opening to the living room to allow for pantries on that wall. I have removed the cabinetry that separates the eat-in kitchen and dining area and that will be the new entrance to the living room. To make the most of the eat-in area I have created a banquette with deep drawers for storage and small pantries on either side.


Option B
For this option I kept the doorway to the dining room where it is now and moved the stove to the center of that wall. This gives you more room when cooking. I kept the entrance to the living room where it is but have made the opening larger so that the living doesn’t feel to separate and that you still have the view to the back windows. I have removed the cabinetry that seperated the living room and eat-in dining area and closed in that space to allow for pantries. This option has an island instead of a peninsula, which houses your sink, dishwasher, additional cabinetry and seating.